
We know that taking care of our own hair to keep it healthy can be a daunting task. You have to take vitamins to keep your hair nice and luscious, pray that the twist out tried from YouTube comes out right the next day, or hope that you finally got that silk press just right. You can do all the steps you’re supposed to and yet, your hair may not give what you wanted it to. So you finally break down and buy a wig, but paying for an install is not cheap. We’re here to assure you that it’s very possible to install a wig on yourself and make the lace melt into your skin, just as if you grew that hair out of your head. Your lace front won’t stand a chance by the time you’re done.
21Ninety has you covered with the products that will melt your lace front wig like ice cream, darling!
What You Need To Melt Your Lace
Get The Right Wig
First things first, if you’re a beginner, it’s probably best to get a wig that isn’t too expensive. Anything could happen, from being too scissor happy to bleaching the knots for way too long. Speaking of bleaching knots, let’s start out with a natural color. You may want to take on new colors and get creative with highlights but it’s also possible to ruin the color if you’re not careful.
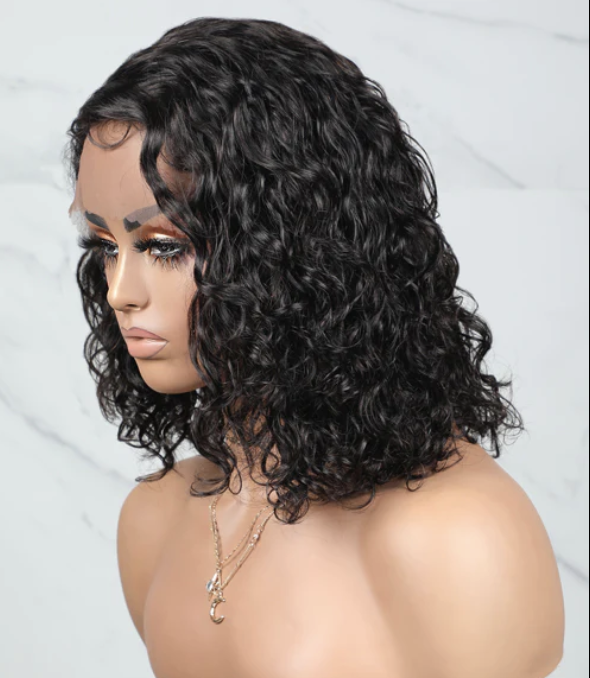
This HD lace wig is the perfect option for beginners. Not only is it a natural color and affordable, but HD lace is one of the best types of lace to use. The curly texture also allows for low-maintenance styling after the installation. After you receive the wig, make sure to wash it.
Shampoo and Condition
You might question how washing a wig helps with melting the lace. The answer is, everything. If you want the hair to look like it’s coming fresh out of your scalp, it needs care. Curly wigs specifically are packaged in a certain way where the hair almost looks like a pack of ramen noodles. Once you put it on, the pattern makes its appearance similar to that of a synthetic wig. Additionally, just for the safety of our own heads, washing is important. We have no idea how dirty that hair really is.

A great shampoo and conditioner brand for wigs is the Silicon Mix line. This line contains silicones, keratin, and ceramide. These give strength and shine to the hair. This line is great for an old wig revival as well. The hair treatment restores the health, shine and softness of dry, damaged and weak hair.
Pluck The Hairline
This may be one of the most difficult tasks but have faith! Plucking the hairline is the way you make the wig look more natural. When wigs are manufactured, there are individual strands of hair tied to each grid of the lace. This process is done in rows all the way to a certain point at the top of the lace, which makes the hairline look very bulky. If you take a look at your hairline, it starts off thinner and gradually becomes fuller going toward the back of your head. That’s the exact way you want your wig to look. Some wigs come pre-plucked and some don’t. For either option, you should still pluck the hairline yourself.
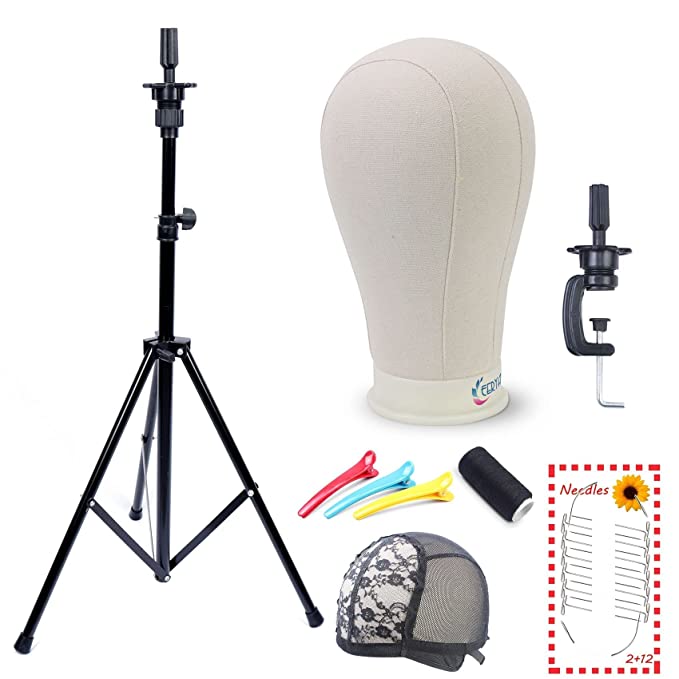
Grab your sharpest pair of tweezers and lets get the ball rolling. Getting a mannequin head for prepping your wig is vital to making your wig look amazing. The best part about this head is that it comes with a 22-inch stand, needles and a bunch of other tools that will come in handy. Once you’ve washed and dried the wig, secure it on the mannequin with the provided needles. Then, take your tweezers and start plucking in a horizontal pattern about 3 inches behind the hairline. Gradually you will make your way to the top of the hairline. Keep in mind that you’re plucking to thin out the hair at the top, not to completely go bald. Be mindful of how many times your pluck in one area.
Pro tip: it’s best to do this while the hair is wet. It makes it easier to see your plucking progress.
Tint That Lace
Another tip to remember about lace wig construction is that the lace may be considered “invisible” but will likely be highly visible sitting on top of your head. The lace is sheer, but you need to throw some color on it so it matches your scalp. This helps to melt your lace wig.
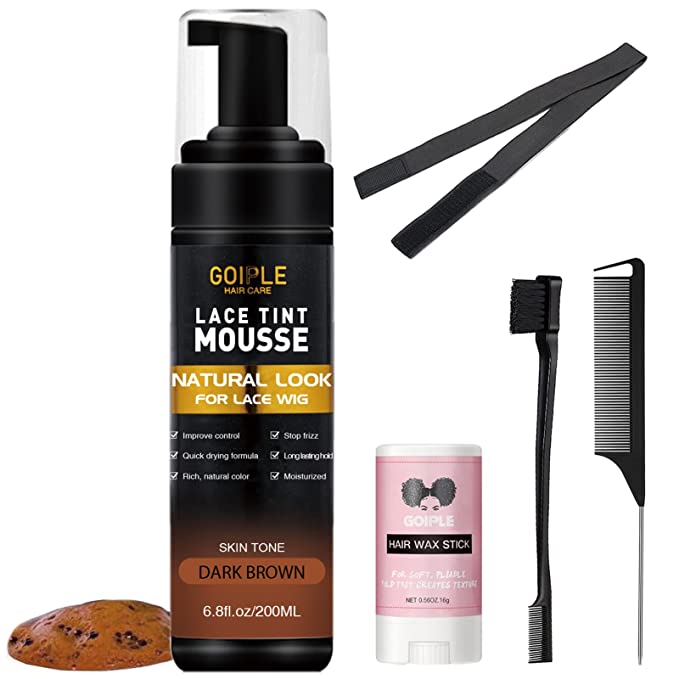
In this situation, lace tint can save the day. Make sure to select a shade that is only a little bit lighter than your face. This bundle is perfect because it comes with products like a hair band, hair wax stick, rat tooth comb and more. These are all items you will be using to install your lace front wig.
After you have finished plucking, comb out the wig one last time to remove any excess hair. Now you can take your lace tint, place a few pumps on a large makeup brush and go under the wig to apply it. Let that dry for a bit.
Glue
At this point you’ll have to get your hands a little dirty. In order to make the hair stay on your head and not lift up, you must glue the lace to your forehead. Don’t worry, it’s not permanent and it won’t hurt, but you will be using the glue for a few different purposes.
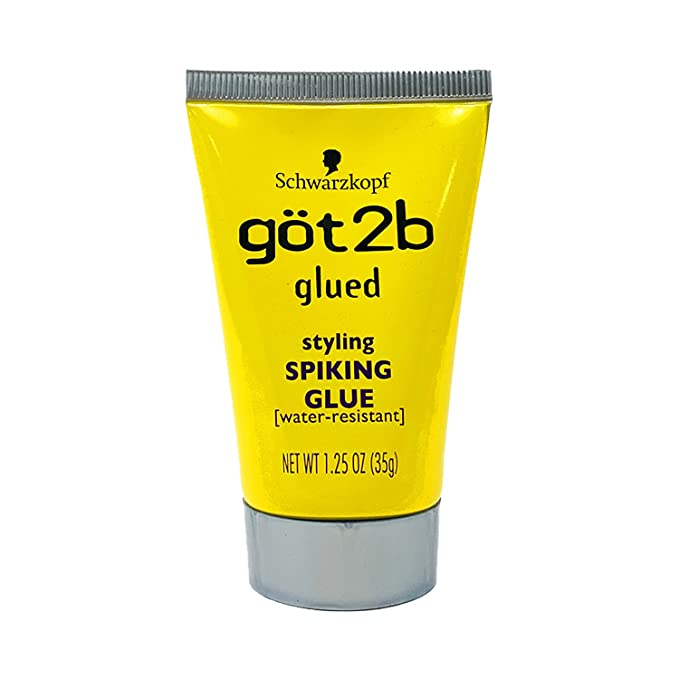
Make sure to braid your natural hair down into flat, straight cornrows. After you’ve accomplished that, take a nude-colored stocking cap and place it over your head. Make sure to pull it down to right below your eyebrows. Take your got2b Glued Hairspray and spray it across your forehead making sure to cover your hairline.
You will also extend your range to right in front of your ears. Once that dries, take a pair of scissors and cut off the cap up to right before your hairline. An easy way to measure is to place your pinky finger right in front of your hairline. The width of your pinky is enough space between where you should cut and your hairline.
Next, you will take your got2b Styling Glue and place tiny dots along your skin right in front of the cap along your entire hairline. Spread that out and let dry. Repeat twice. Now it’s time to take your wig and place it over the glue. Align the wig’s hairline right where you placed your glue. Grab your elastic band and tie it over the wig’s hairline to set everything in place.
Finishing Touches
After your wig is set, take the elastic band off and cut the lace. You’ll need a razor to do this. Cut the portion of the lace that isn’t glued down. Cut in a small zig-zag motion as opposed to straight across leaving just a tiny bit of lace as you do so. Check the lace of the wig to make sure no parts are sticking up. If so, spray loose parts with the got2b spray and tie them down again with the elastic band.
You’re almost done! Take a precision makeup brush and apply concealer on the wig’s part. At this point, if your lace isn’t all the way melted, take your lace tint and apply it on top of the lace that isn’t well blended.
And you’re done! Get ready to slay the day with your new melted lace frontal wig.
Our editors love finding you the best products and offers! If you purchase something by clicking on one of the affiliate links on our website, we may earn a commission at no extra cost to you.