Braids have always been a cornerstone of beauty and culture, especially in the early 2000s. One style that has stood the test of time and continues to reign supreme is the cornrow look, made iconic by artist Alicia Keys. Keys’ cornrow braids not only became her signature look, but also served as a statement of pride and individuality.
Here’s everything to know about Alicia Keys’ braids, from their cultural significance to the evolution of the style to how you can recreate this look yourself.
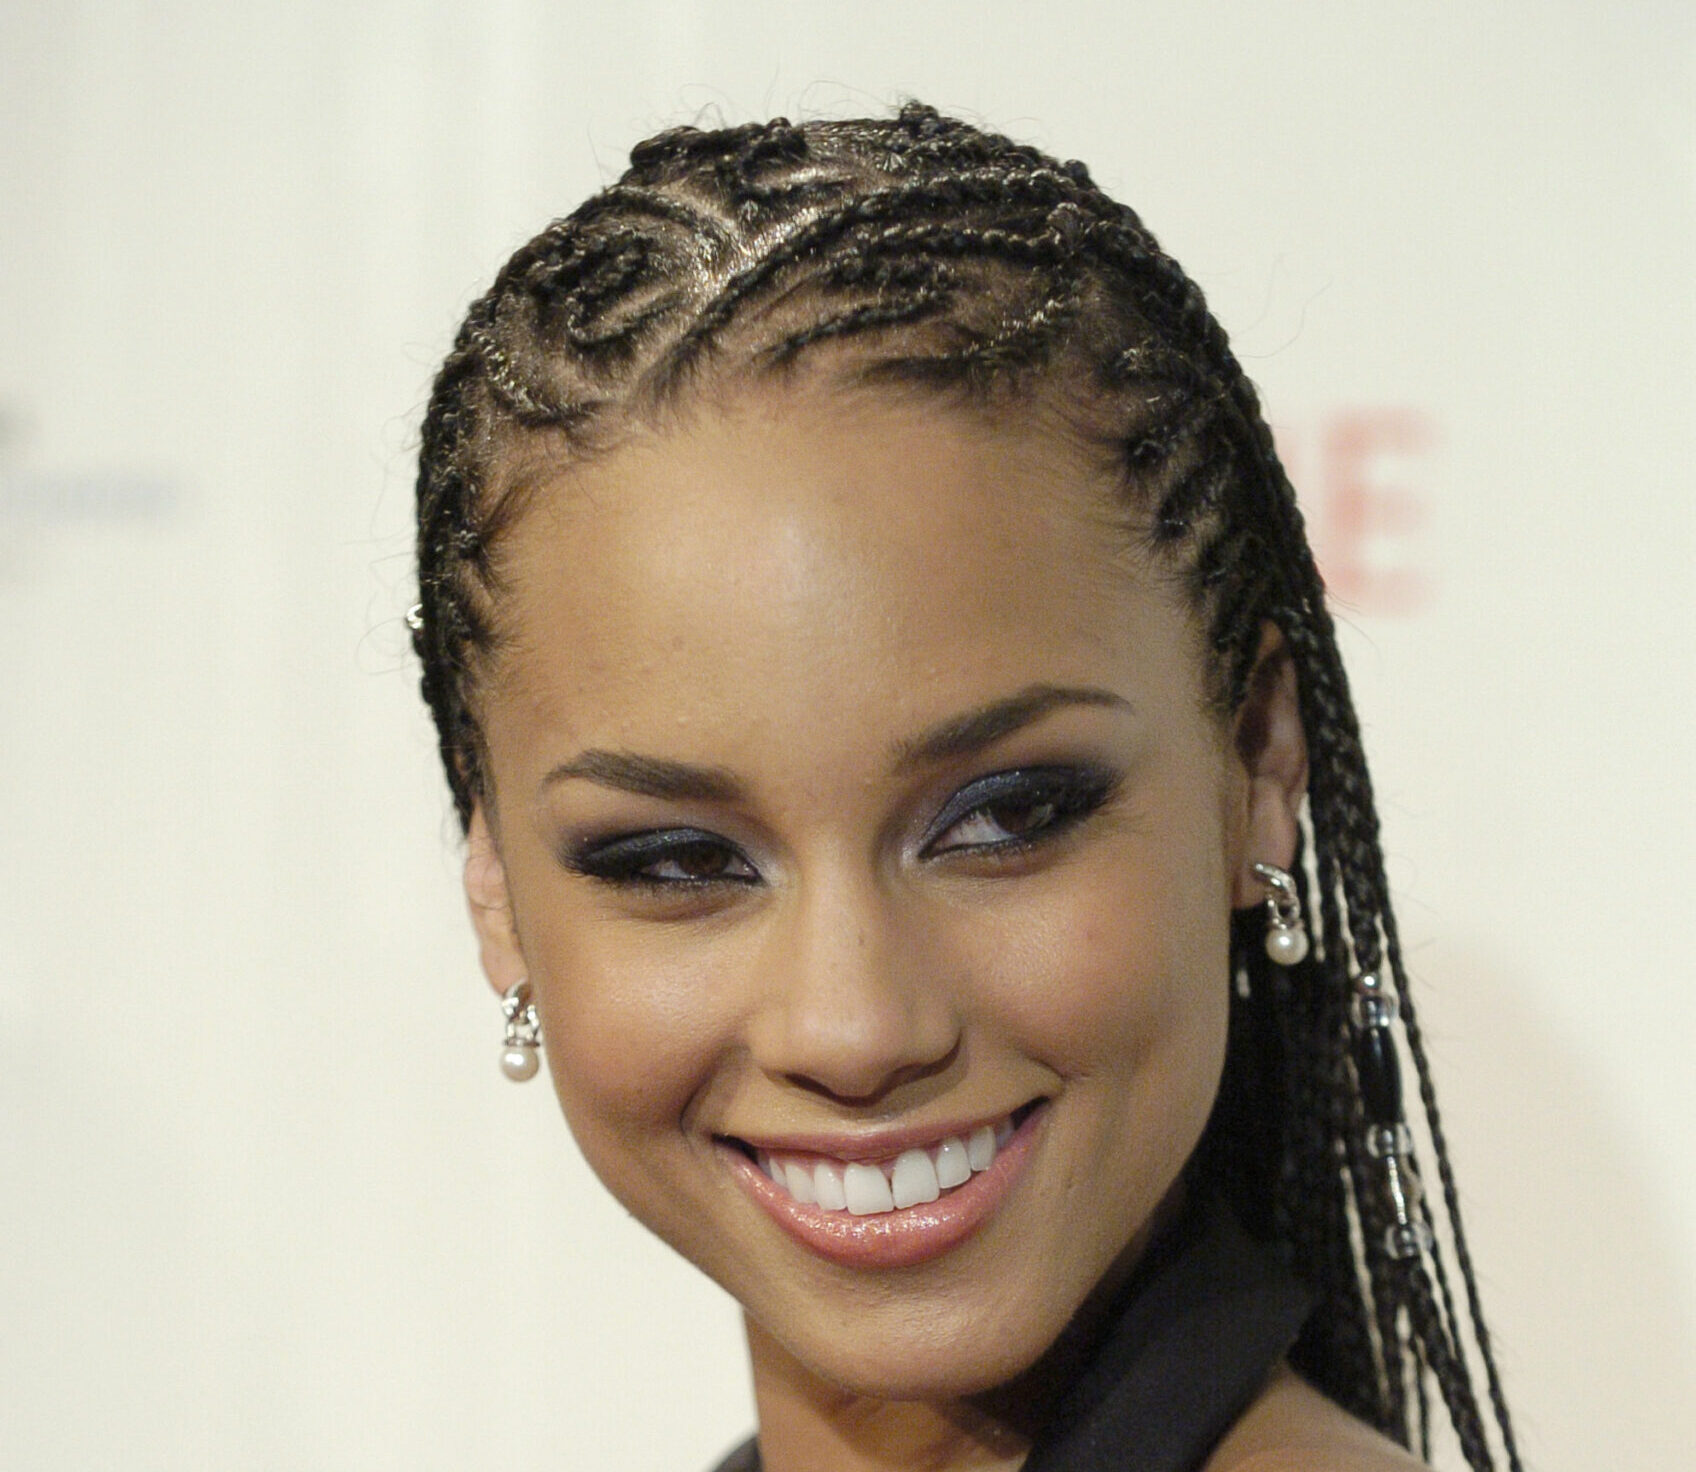
What Are Alicia Keys’ Braids?
Alicia Keys’ braids, particularly her cornrows, have become an iconic part of her identity over the years. Cornrows are a traditional African hairstyle where the hair is braided close to the scalp in rows, typically creating a geometric or symmetrical pattern. She’s sported cornrows in various styles throughout her career, though the ones most associated with her are the sleek, tightly braided styles that complement ones’ natural beauty.
The look is beyond aesthetic. Keys’ debut album “Songs in A Minor” catapulted her rise to fame as she crafted a public image that embraced her natural hair texture and celebrated her roots. Her cornrows helped defy traditional beauty standards of the 2000s that prioritized straight or relaxed hair, paving way for other Black artists to rock their natural hair and braided protective styles.
How to Do Alicia Keys’ Braids
Recreating Keys’ iconic braids is easier than you might think. Here’s what you need to know.
Materials Needed
- A comb: A rat-tail comb is essential for parting your hair and creating clean sections for the braids.
- Edge control: A strong-hold hair gel will help keep the braids neat and ensure they last longer.
- Hair ties: These are needed for sectioning your hair or securing the ends of your cornrows.
- Bobby pins: These may be useful for securing any stray hairs or the ends of your braids.
- Hair extensions: If you want to add length or volume to your cornrows, you can use synthetic or natural hair extensions.
- Spray bottle with water: To keep your hair damp while you work, a spray bottle with water or a leave-in conditioner helps control frizz.
Alicia Keys’ Braids Tutorial
- Prepare Your Hair: Begin by washing and conditioning your hair thoroughly. Dry your hair completely or leave it slightly damp. Apply a generous amount of hair gel or edge control to smooth down any flyaways and prepare your hair for braiding.
- Part Your Hair: Using a rat-tail comb, create a clean middle or side part. Then, section your hair into manageable parts. For a simple cornrow look, divide your hair into several vertical sections, or play with more intricate parts for geometric or zigzag patterns.
- Start Braiding: Begin at the front of your head and take a small section of hair from your part. Divide the section into three smaller strands. As you braid, incorporate more hair from the scalp by adding a bit of hair from each side as you go. The key is to keep the braids as close to the scalp as possible to achieve the neat, crisp look that Alicia Keys is known for. Continue this process row by row, ensuring that the braids are tight but not too tight to avoid tension on your scalp. Work your way back towards the nape of your neck, and remember to keep your sections even.
- Secure the Braids: Once you reach the end of each braid, secure the braid with a small elastic hair tie. If you’re adding extensions for length or volume, do so toward the end of the braid and continue braiding the synthetic hair until you reach the desired length.
- Finishing Touches: Once all the braids are complete, gently pull on each braid to tighten and adjust them. If needed, use bobby pins to tuck in any loose ends. To maintain the sleek, shiny look, apply a bit of shine serum or a light-hold hairspray.