The tiny, uniform locs, known as micro locs, are an increasingly popular style. A trendy alternative to traditional dreadlocks, the appeal of micro locs lies in their ability to combine the beauty of locs with a more delicate twist. They are ideal for the girls who want to express a new version of themselves while still achieving long-term natural hair care. The growing trend of micro locs can also be attributed to their versatility and ease of maintenance.
If you’re ready to enter your micro locs era, here’s everything you need to know.
What Are Micro Locs?
Micro locs are a smaller version of traditional locs, created by sectioning the hair into tiny, uniform parts and allowing it to mat and lock over time. Unlike traditional locs, which can be larger and more defined, micro locs are significantly smaller, offering a more refined and intricate look. They can be installed using two-strand twists, interlocking, or palm rolling, and are often seen as a more elegant alternative to the larger, bulkier loc styles.
Micro locs can be worn in various lengths, and while they require patience to install and maintain, they are praised for their low-maintenance nature once the locs are fully formed. This makes them a popular choice for those who want the benefits of locs without the time-consuming upkeep of traditional styles.
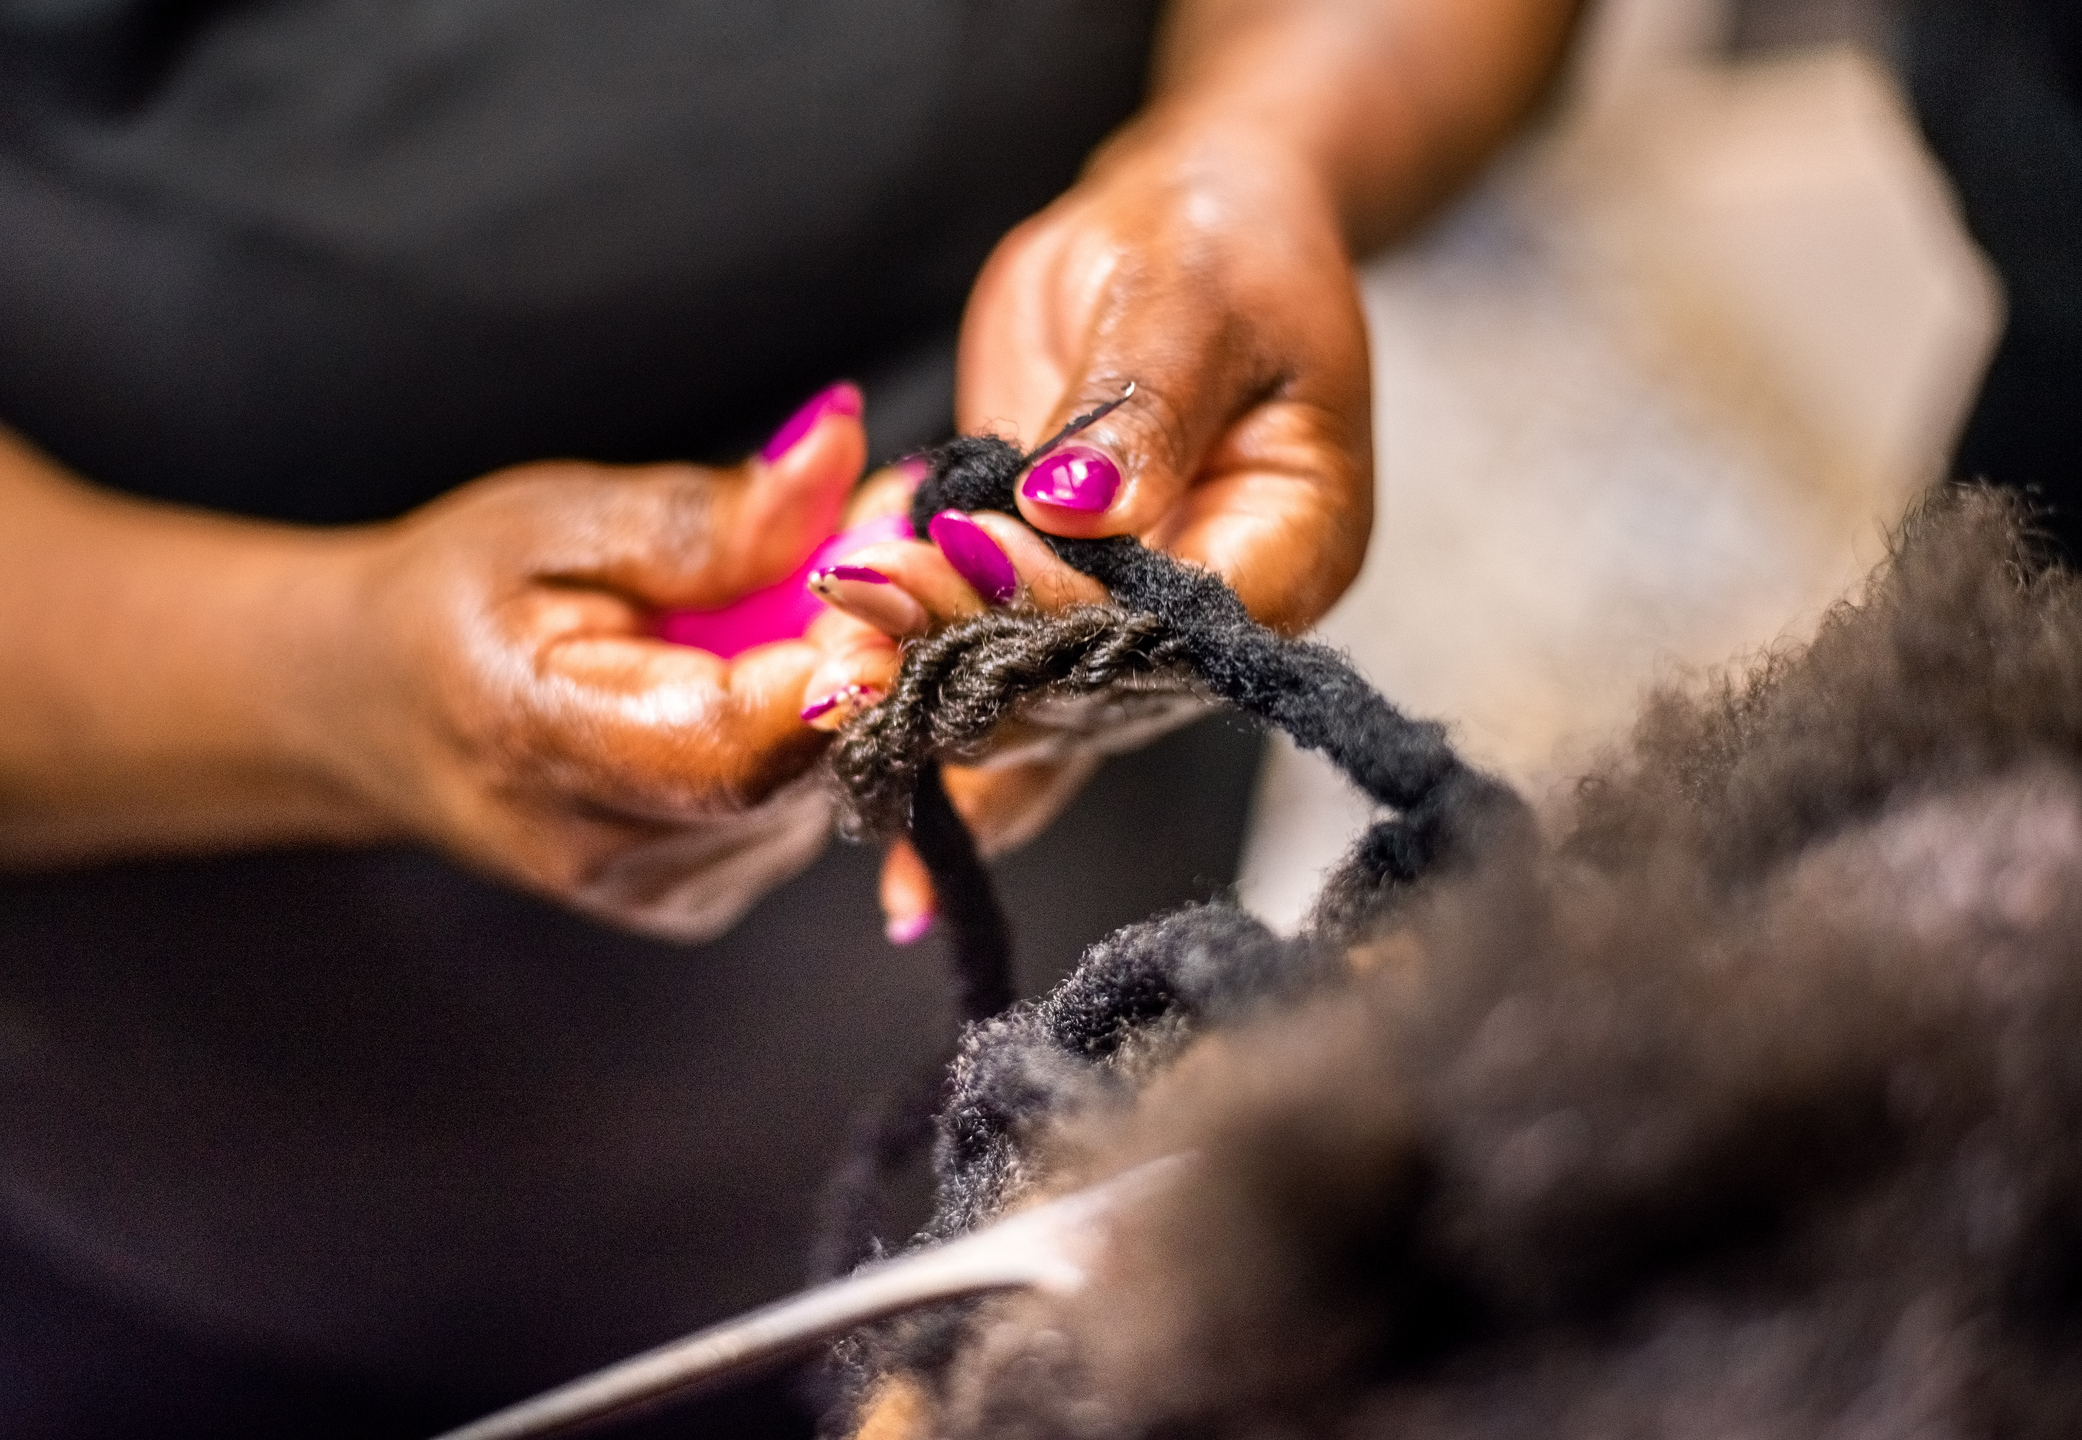
How to Do Micro Locs
Being that the locs are so small, creating micro locs requires time, precision, and patience.
Materials Needed
- Rat tail comb: Essential for creating precise, small sections in your hair.
- Hair clips: To keep hair sections separated during installation.
- Leave-in conditioner or natural hair gel: Helps in defining and holding sections while twisting or interlocking.
- A crochet hook: If you plan on using the interlocking method to form the locs.
- Rubber bands or clips: To temporarily hold sections in place.
- Hair moisturizer or oil: To keep the hair hydrated and healthy during the installation process.
- Mirror: To ensure you’re creating evenly sized sections and a uniform loc pattern.
Micro Locs Tutorial
- Clean and Prepare Your Hair: Start with freshly washed and conditioned hair. Clean hair is essential to ensure proper loc formation. Apply a leave-in conditioner or a natural moisturizer to damp hair to keep it hydrated and easier to manage during the sectioning process.
- Section Your Hair: Using the rat tail comb, section your hair into small, uniform parts. The size of the sections will determine how small or large your micro locs will be. Typically, sections for micro locs are no larger than 0.5–1 cm wide. Clip each section out of the way as you work through your hair. The smaller the section, the smaller and more delicate your locs will be.
- Start Twisting: Once you’ve sectioned your hair, begin the two-strand twisting process. Take one section of hair and divide it into two smaller strands. Twist the strands around each other, moving downward. Make sure the twists are tight enough to hold the hair in place but not too tight, as this could cause breakage.
- Secure Each Loc: After you’ve twisted each section, secure the end of the loc with a rubber band, clip, or small elastic. As your micro locs mature, the rubber bands or clips will become unnecessary, but they help hold the twist in place during the initial stages.
- Repeat the Process: Continue twisting each section of your hair until all your micro locs are installed. This can take several hours, depending on your hair length, texture, and the number of sections. It’s important to be patient and ensure each loc is even in size and shape.